
Importing Records
The 'Import Records' drop down on the Dashboard gives you the ability to perform one off imports of RIF-CS XML records into your account. The 3 methods are detailed below.
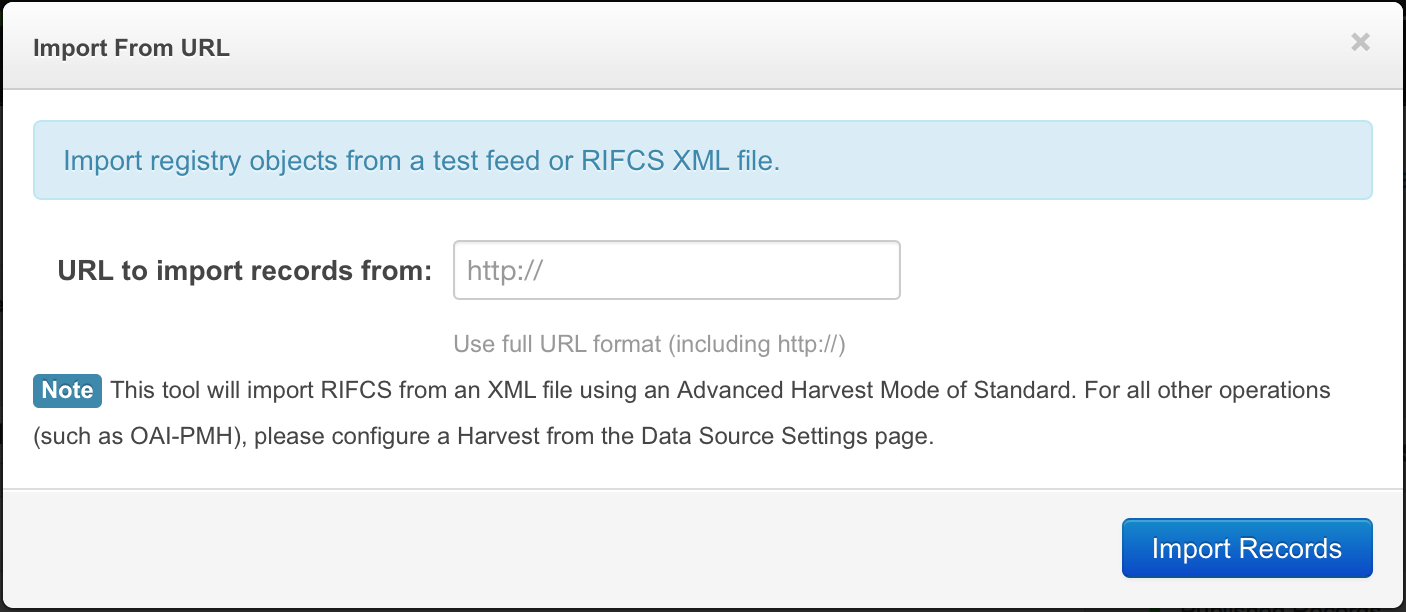
Import from a URL
The import from a URL option allows you to point the registry to a RIF-CS XML file which is publicly exposed on a server for download and ingest.
If you don't have a server you can expose your file from, services such as Dropbox.com provide a quick and easy way to store files for download. Note that if you use Dropbox, you will need to provide a direct download link to import your records successfully (see help).
To import from a URL:
-
Click the drop-down button beside the
'Import from Harvester'button and select'Import from URL'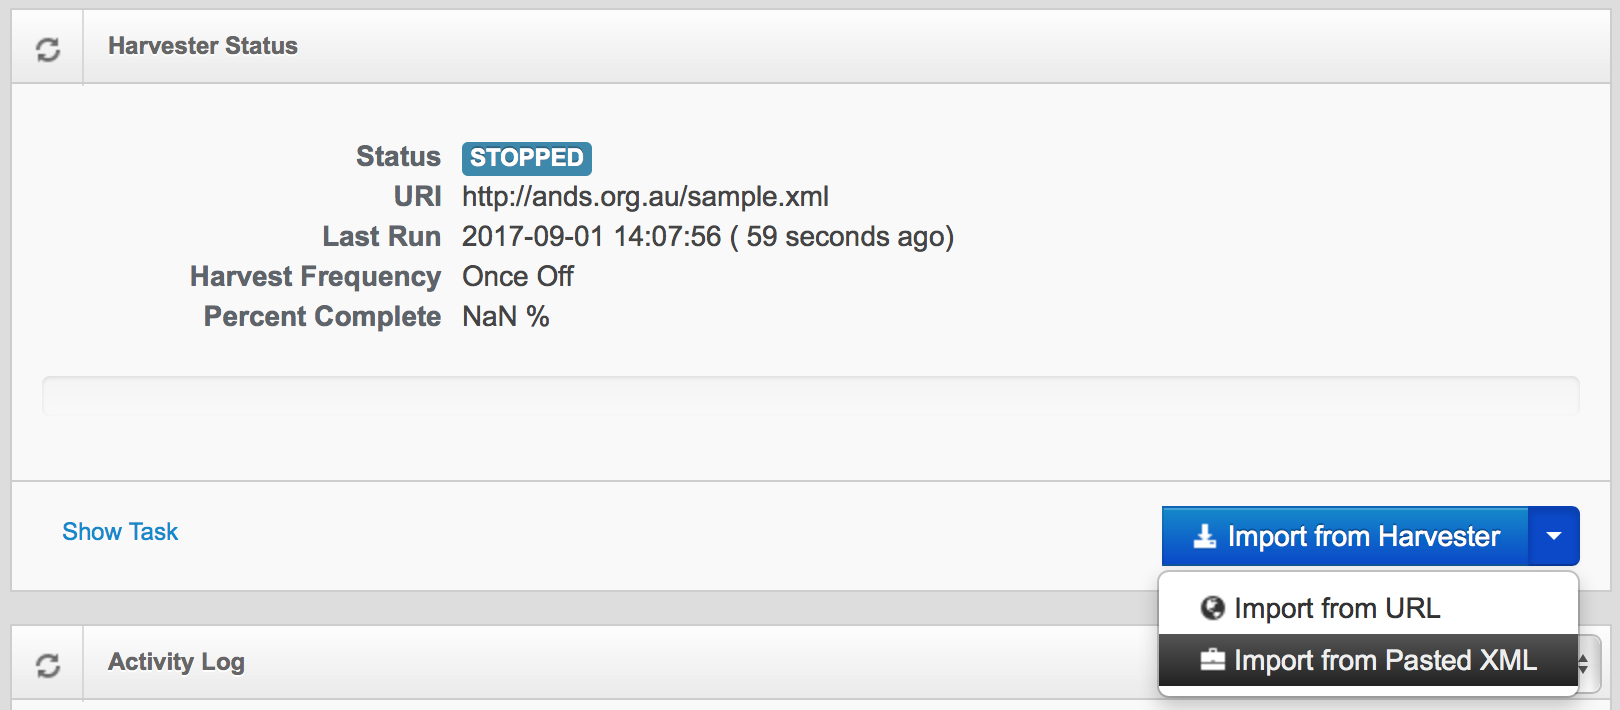
-
A pop out form will be displayed.
-
Enter the URL of where you RIF-CS XML file is publicly accessible for download.
-
Click the
'Import Records'button. -
The system will create an activity log entry for the request and display the details within the pop out form.
Import from Pasted XML
The pasted XML option provides a quick and easy method of importing small numbers of records into the registry from raw RIF-CS XML.
To import from pasted XML:
- Click on the drop down button next to 'Import from Harvester' then select
'Import from Pasted XML'as per screenshot below.
- A pop-up window titled
'Import from Pasted XML'will be displayed. - Copy and paste your valid RIF-CS XML into the form.
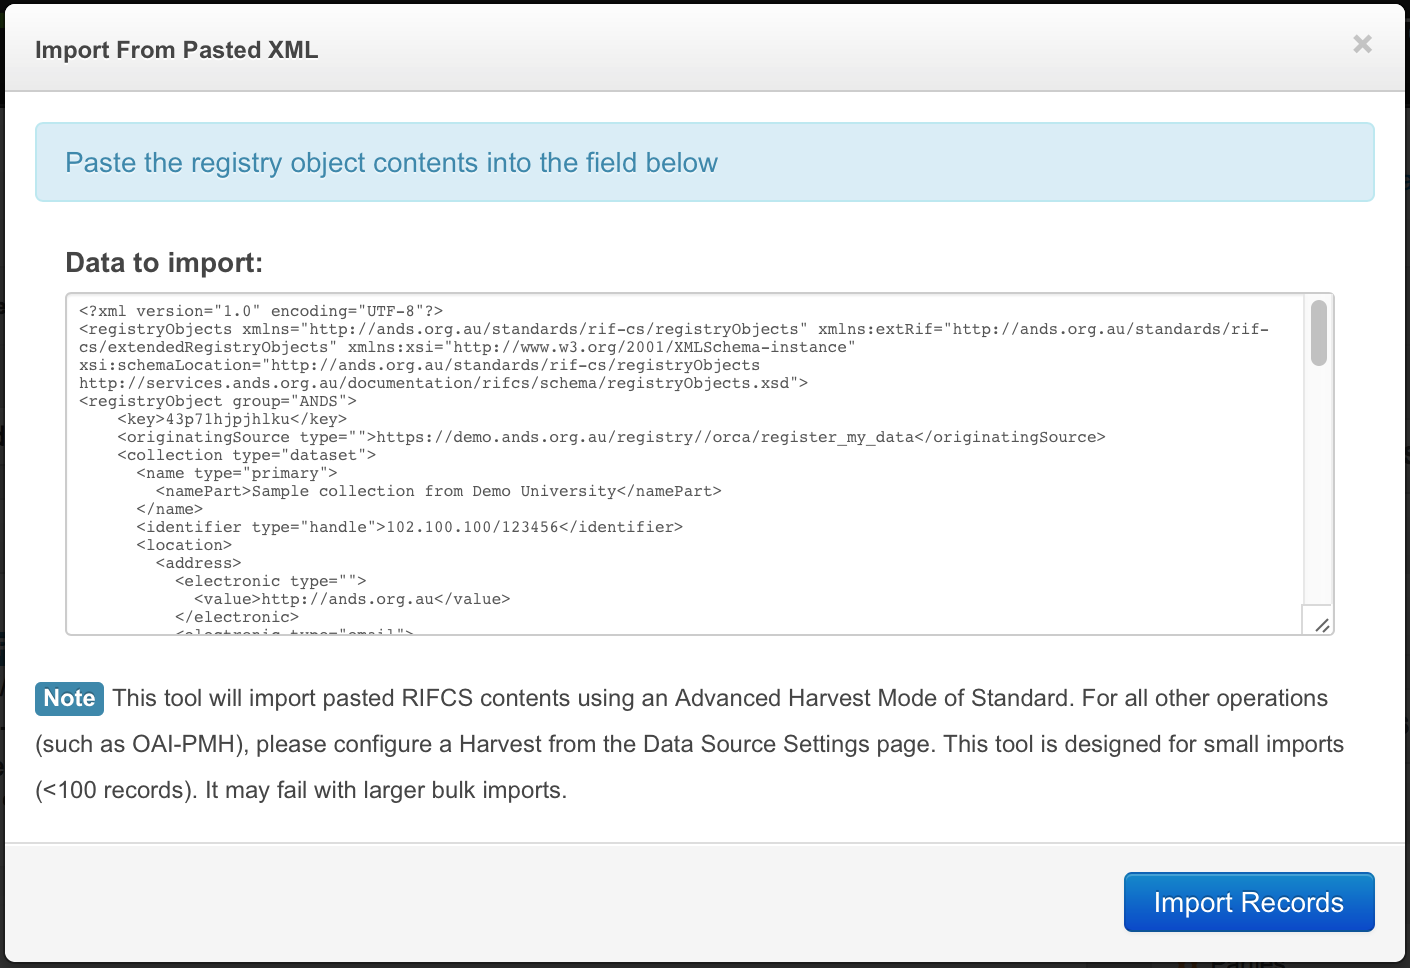
- Click the
'Import Records'button. The message below will be displayed when your import has finished:
- The system will create an activity log entry for the request and display the details within the pop out form.
Import from Harvester
This option allows you to schedule an immediate harvest of your records into the registry.
- For this method to work you will need to ensure your harvest settings are configured correctly in your Data Source Account Settings.
- Where you have a regularly scheduled harvest the system will cancel the scheduled harvest and schedule a new one for the current system date and time.
- Upon completion of the immediate harvest, the system will re-schedule your regular harvest based on the configuration in your Data Source Account Settings.
To import from the Harvester:
- Click the
'Import from Harvester'button in the lower right hand corner of the'Harvester Status'box.

- A new harvest will be scheduled and the details displayed in the Activity Log on the Dashboard page.

- Upon completion of the harvest the Activity Log will be updated with the results.